Appearances matter which is why it is hardly surprising that many car owners take pride in how their ride looks. The car’s color can be like a personal statement and ultimately it can say a lot about you.
Over time you will need a new paint job, which is the reason why you should be thinking about how to prep a car for paint even before you get a new car. You can’t just apply a new layer of paint over the existing one, because you are not going to achieve a great result. So in this article, we are going to take you through all the steps you have to take before repainting your car and show you how to prep a car for paint.
Things you’ll need to prep a car for paint
Painting a car is one of the most difficult jobs for car enthusiasts because you really don’t want to mess it up. In addition, you’ll need a garage or some open space where you can go through with preparations and paint the car.
How well you prepare your car for a paint job will have a major impact on the entire endeavor, because the new layer of paint may react with old paint in an unpredictable manner.
That’s why you need to have the following equipment to prep a car for paint properly:
- Masking tape and paper
- Protective goggles and a face mask
- Solvents for cleaning surfaces
- Air compressor
- Orbital sander with interchangeable sanding pads
- Hand sandpaper
- Body filler to repair dents
- Clearcoat
- Primer
- Basecoat paint
- Paint thinner
- Paint sprayer
You should also arm yourself with patience and pay extra attention to details because missing a patch of old color might ruin the entire paint job.
Using cutting to remove top layers of paint
Now that you have all the equipment at one place you can start removing thin layers of paint with a cutting compound. There is more than just one type of cutting compound and you must check if the one you want to get is the right choice for your car.
Make sure to protect all parts of the car’s body to which you don’t want to apply the cutting compound with masking tape or paper. This process can be messy, especially if you are using an electric polisher, which is why you should wear old clothes and protective gear.
Start by applying the compound to a particular area and either use a clean cloth or an orbital polisher to spread to compound over part of the car’s body you are treating. Don’t apply too much pressure and make frequent pauses to evaluate the results.
Furthermore, focusing on one area for too long can be counterproductive since the paint can heat up and burn in the process. Adding water to the area to which you want to apply the cutting compound will keep the paint cool and help spread the compound more efficiently.
Repairing dents on the car’s body
This step is only important if you’ve dented your car as you shouldn’t apply fresh paint to uneven surfaces. This task is an easy one if you are covering small patches, but as the dent gets larger you can expect things to get more complicated.
A body filler is a plastic resin that sticks to the metal so that it can render a dent invisible. These products also help fight off the rust which helps keep the car’s body in a good condition for a long period of time.
Add only a small amount of the body filler to the dent and spread it so that it is covered entirely, and then leave the body filler to harden. Chances are that the filler is not going to be perfectly smooth once you apply it, and you should use an orbital sander to smoothen the surface. This is by no means the only way you can fix a dent, and you can find more ways to remove car dents at this link or click here to learn how to fix deep scratches.
Cleaning the car
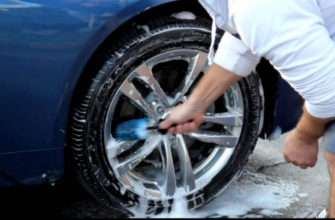
After you’ve removed all scratches and dents from the car’s body, you should proceed to wash it thoroughly. This will enable you to see if further repairs are needed as well as to remove all traces of dust, fingerprints, grease, or dirt. Optionally, you can use an air compressor to remove dust before you start washing the car and ensure that your paint job is going to be perfectly smooth.
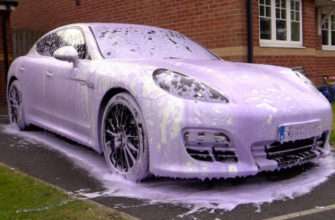
Proceed to apply car wash soap and rinse it from the vehicle, before leaving your car to dry. After the car dries up, you should wipe the entire of its body with a solvent you choose. You can find more tips on how to clean a car here.
Sanding off the old paint
This is the essential step in the process of prepping your car for a paint job because you have to remove old layers of paint before you can start applying fresh paint.
Getting an orbital sander that allows you to switch between different sanding pads is going to make this process much quicker, since sanding the entire car body manually can be slow and time-consuming.
You should start sanding the parts to which you applied the body filler in order to make sure that they are smooth and even, before proceeding to remove all paint transfers and the car’s top layer of paint.
A 400-grit sanding pad is soft enough to enable you to get rid of the excess body filler effortlessly, but if you are planning on removing the paint from the car’s bodywork you should use 800 or 1.200-grit sanding pads.
Once you start sanding off the old paint you should continue until you remove the primer and expose the metal underneath.
However, if you want to combine the old paint with a new one you don’t have to remove the paint entirely but you should bear in mind that modern gel coats and water paints may not be compatible with older paints.
Don’t apply too much pressure while you are sanding off the paint especially if you are just looking to get rid of a minor scratch in a color coat. You can learn how to remove water stains from car glass at this link.
Priming a car before painting it
An automotive primer creates a protective barrier over the surface to which it was applied so that the sealer and the second coat of paint can stick to it. Priming also prevents a chemical reaction between old and new layers of paint, while some high-quality primers can even make bare metal smoother.
Keep in mind that you are going to need different types of primers to paint over metal, plastic, and other types of surfaces. What’s more, you shouldn’t apply a primer for metal surfaces over the areas of the car’s body that contain the body filler. Don’t start priming a car before you cover all parts of the vehicle you don’t want to paint and make sure to wear protective equipment once you start applying the primer.
You’ll have to apply at least two and preferably more coats of primer to the metal parts of the body in order to ensure that they are covered entirely. After it dries you should examine the area to which you applied the primer and use orbital sender to eliminate all imperfections. It may be necessary to go through this process several times until the entire surface you want to paint is perfectly smooth, so be patient and pay attention to details.
Get the right paint
Even though you shouldn’t start painting a car before you go through all the necessary preparations, you can still pick the new shade of your ride. If you are painting just a portion of your car, then matching its color is the best way to go, while opting for a new color may be a good idea if you want to paint the entire car body.
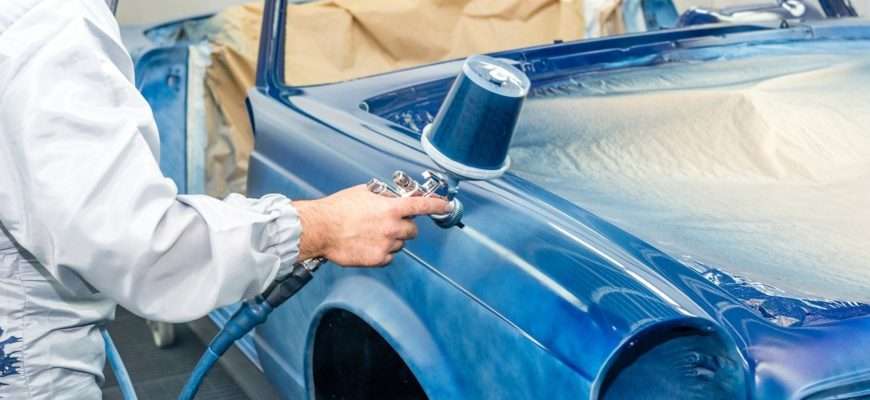
Before you start applying the paint you should cover the windows and the windshield in order to avoid accidentally spraying over them. Follow the manufacturer’s instructions to prepare the paint for spraying and ensure that you thinned the paint correctly for the equipment you are using.
The paint gun you are using may require additional tips or nozzle caps, which is why you need to make sure that you have everything you need to complete the paint job successfully before you start applying the paint.
Frequently asked questions about how to prep a car for paint
What is the perfect climate for prepping a car for paint?
Although you can prep a car for paint under any weather conditions if you are performing this task indoors, it is still better to go through this process in a dry and mild climate.
How much does it cost to prep a car for paint?
The amount of money you will have to spend to prepare a car for paint depends on the size of the surface you want to paint, whether or not you need to repair dents and tools you are going to use for the job. Even so, you shouldn’t spend more than a couple of hundreds of dollars to paint the entire car from the comfort of your home.
Which type of primer should I use?
The answer to this question depends on the material to which you want to apply the primer. You will have to use a different primer if you want to paint over metal, body filler or plastic, so you should get a primer that best fits your needs
Is there any difference between a sealer and a primer?
Even though some types of primers can be used as sealers, it is still better to apply a primer after you finished sanding and then add a sealer before spraying the paint. Moreover, using a sealer is likely to increase the quality of the paint job.
Conclusion
The key to a good paint job is in preparation, since removing all layers of primers, sealers and paints efficiently will enable the new layer of color to stick to the material better and eliminate the chances of a chemical reaction between old and new coats of paint.
Furthermore, you are going to need additional equipment to repair dents and to reach the bare metal of the car’s body. That’s why you shouldn’t start prepping a car for a paint job unless you are fully confident that you are up to the task.
